How To Install A Colorbond Roof
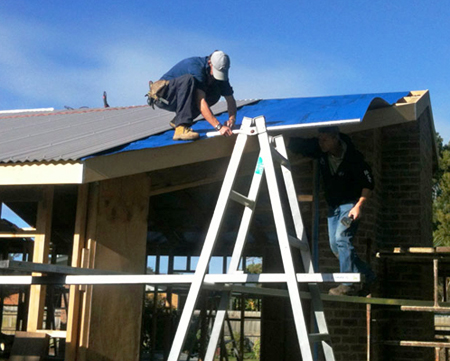
[caption caption="Steel roofs can be installed in a day or two." align="right"]
[/caption]
With the house's frame erected, in many cases it's time to put on the roof. Whether this goes on before walls go up will depend on what's being built. The main purpose of your roof is to keep the water out of your house, which is why it's an early priority. Many other parts of building a home depend on keeping things dry and sheltered (including tradespeople).
Most metal roofs in Australia are made of steel, or some variation thereof - perhaps with different coatings to reduce heat absorption. Metal roofs usually come with a long warranty, and they're often chosen because they're affordable and very convenient to install.
How metal / Colorbond / Zincalume roofs are installed
Metal roofs are considerably less complicated to install than tile roofs, and typically won't take more than a day or two to put on. Metal roofs need to be installed according to the Australian Standard AS 1562 – 'Design and installation of metal roofing'.
First, fascias and guttering go up, and the roofing materials are delivered to the site. Next, horizontal battens are installed onto the trusses, to support the roof cladding.
Sarking and roof blankets
A layer of sarking (reflective foil laminate, or RFL) is then put in place. While this isn't strictly compulsory in all cases, sarking's generally considered to be very important for metal roofs to help prevent condensation. Condensation forming on the underside of the roof can cause roofing sheets to rust prematurely, and can also drip down to rot timber framing, wreck plaster and cause any number of other problems you'd be far happier not having to deal with...
A lot of the time, a foil-backed 'roofing blanket' that incorporates a layer of glasswool or rockwool is used instead of simply a layer of RFL. This serves the same purpose, but also provides insulation against sound transmission (e.g. to dampen the sound of rain) and adds a little more thermal insulation.
Putting on the metal roofing sheets
The metal roofing sheets are light, and are usually passed up to the roof by hand, one by one. They're laid in place, and are carefully marked and cut for hips and valleys by running a chalk line across them to get the shape right.
Special tools are used to cut metal roofing so as to prevent burred edges which can lead to rusting. The sheets are typically cut using either a power saw with a metal cutting blade, a 'nibbler' or a roofing shear / sheet metal shear (e.g. an 'Exaclibur Shear').
Sheets must be carefully lapped over each other in the direction least likely to expose the joins to the worst anticipated or prevailing weather, and for that reason metal roofs are normally installed starting from the 'leeward' side rather than the 'windward' side.
Attaching the roofing sheets
The edges of the roofing sheets are normally pre-shaped to prevent moisture from being sucked into the overlapping areas by a 'capillary action' too - so in most cases only one overlap is recommended between the sheets. It's also very important for the installer to ensure that the roofing sheets align perfectly at the gutter end of the roof.
Metal sheets should normally be drilled and screwed down on the 'crests' of the corrugations in the sheet rather than the valley – although there are some exceptions. Some sheets also use concealed fixings which don't require holes to be drilled.
Once the sheets are on, the 'valleys' at the top end of the sheets up at the ridge of the roof are bent upwards, so as to reduce the chance of water being blown up through the top of the sheets - and to reduce the chance that pesky vermin will sneak in through the gaps. Pieces of metal called cappings are then installed across the ridge of the roof, across roof hips, at fascias etc.
Getting rid of swarf
After the roof is finished, it's vital that it's very carefully cleaned off using a broom or a high-powered leaf blower. Tiny offcuts of metal (called swarf), if they aren't removed, can cause a brand new roof to rust and spoil very quickly.
This is also important for when penetrations are put into your metal roof for things like exhaust vents and roof windows - cuts need to be clean, flashing needs to be done carefully and all swarf and debris needs to be properly removed to prevent damage.
How long does it take to install a metal roof?
Metal (i.e. Colorbond or Zincalume) roofs normally take a day or two to install at the most.
Which trades will be required?
- Metal roof installers. In some states, metal roofs must be installed by licensed plumbers.
How To Install A Colorbond Roof
Source: https://build.com.au/how-steel-colorbond-zincalume-roofs-are-installed
Posted by: kwansuicharcon54.blogspot.com

0 Response to "How To Install A Colorbond Roof"
Post a Comment